Choosing Dental extraction forceps in 2026 is not simply a matter of picking a familiar shape. The right instrument should match the tooth, its position, and the clinician’s technique. A forceps that fits poorly may slip, obscure access, or make controlled movement harder. Small details matter.
Look closely at the beak design, hinge action, handle length, grip, and overall balance. For example, a narrow beak may provide useful access around a posterior tooth, while a broader profile may suit a different crown shape. These are not universal rules. Tooth anatomy, root form, and the condition of surrounding tissues can change what works. A comfortable handle matters, too, especially during repeated procedures. It should feel secure without forcing the hand into an awkward position.
Material and maintenance deserve equal attention. Check product specifications, finish quality, and the manufacturer’s cleaning and sterilization instructions. Smooth, well-aligned beaks and a stable hinge are practical signs to inspect before use. Follow applicable clinical protocols, and seek guidance from qualified dental professionals when selecting instruments for a specific procedure. Training and sound judgment remain essential. The instrument alone cannot ensure a predictable outcome.
There is no single best pair. Even experienced clinicians may prefer different designs, and preferences can deserve a second look. A useful choice balances access, control, durability, and fit for the intended task. In this guide, we’ll examine how to compare these features and make a considered selection in 2026.
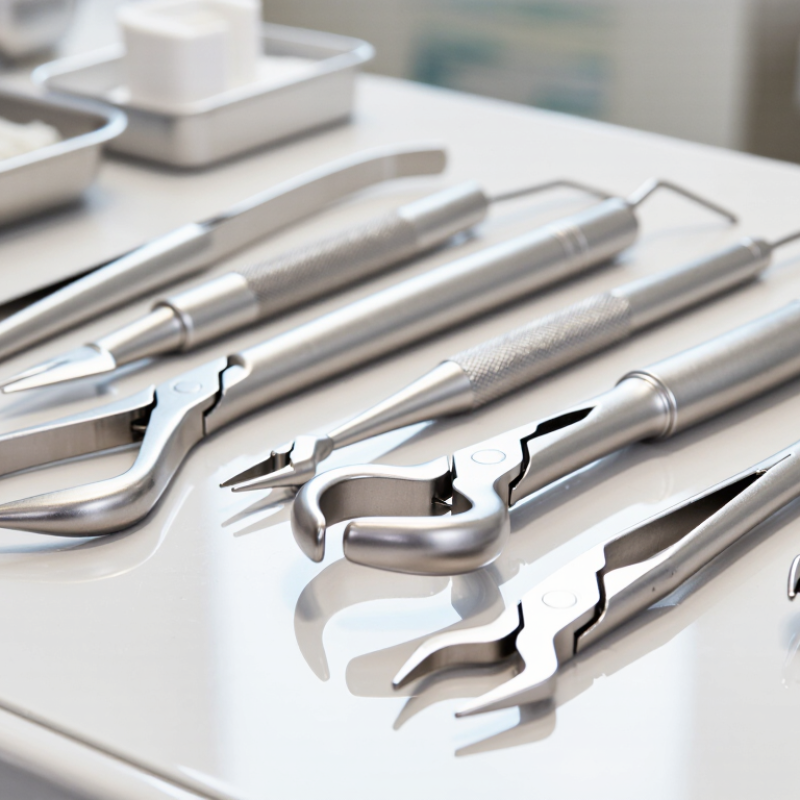
Before choosing dental extraction forceps, identify the tooth and confirm its position in the arch. A maxillary tooth and a mandibular tooth may need different instrument angles and beak designs. Check the patient’s chart and radiographs, then assess crown condition, root shape, and surrounding bone. A fractured crown can make visual identification less reliable.
Match the forceps to the tooth’s anatomy, not just its name. Broad molar beaks may engage furcation areas, while narrower beaks can suit some single-rooted teeth. Check that the beaks seat securely without crushing the crown or slipping onto soft tissue. Fit matters. If the roots are curved, divergent, or unusually long, the planned approach may need to change.
Consider the procedure, too. A straightforward extraction with an intact crown differs from a case involving substantial root curvature or a tooth that may require surgical access. Choose instruments only within your clinical training, and follow local protocols for assessment and patient care. Forceps selection is not a substitute for a complete examination. Even experienced clinicians can find that a tooth behaves differently than expected; pause and reassess rather than forcing movement.
Identify the tooth, arch, and procedure before choosing forceps. Typical root counts can help you understand tooth anatomy, but they do not determine forceps selection on their own.
Root counts shown are typical anatomical patterns; individual teeth can vary. Select an instrument suited to the specific tooth and arch, and consider the planned procedure, access, and clinical findings.
Choosing dental extraction forceps starts with the tooth’s anatomy, not just a familiar instrument number. Beaks should engage the crown or root surfaces securely without rocking or pinching soft tissue. Incisor beaks are generally narrower than molar beaks, while molar designs may reflect the tooth’s furcation and arch. Small differences matter. A beak that looks close on a tray may not seat well in the mouth.
The FDI two-digit system helps identify the target consistently. The first digit indicates the quadrant:
for permanent teeth. The second digit counts from the midline. For example, 16 is the upper-right first molar, viewed from the patient’s perspective; 36 is the lower-left first molar. Primary teeth use quadrants 5 through 8 and positions 1 through 5.
Check the chart and patient orientation carefully. It is easy to reverse sides when working quickly.
Use the tooth number as a guide, then assess the actual crown, root exposure, and access. Anatomy varies, and a heavily restored or fractured tooth may not match a textbook image. The ideal fit is firm and controlled, not forced. Even a useful selection chart cannot replace clinical judgment, and I would still pause to reassess if the beaks slip or tissue becomes trapped.
Straight, bayonet, and cowhorn forceps differ in how they direct force, not simply in how much leverage they provide. Straight designs keep the handle and jaws aligned, making controlled axial movement easier on accessible teeth. Bayonet jaws offset the handle, helping reach narrow spaces, especially around posterior roots. Cowhorn tips engage molar furcations; their shape can help expand the socket as the tooth moves. More leverage is not always better. Excess force can damage roots or surrounding bone.
The World Health Organization’s 2022 Global Oral Health Status Report estimates that oral diseases affect nearly 3.5 billion people worldwide. That figure describes disease burden, not forceps performance; it cannot establish one design as superior. In practice, clinicians match the instrument to tooth anatomy, access, and root form, then assess mobility and bone support during treatment. A cowhorn may feel powerful on a suitable molar, but it is a poor substitute for sound assessment. Bayonet forceps can improve access, yet their offset jaws may make force direction less intuitive. Small differences matter. Comparative clinical data directly ranking these designs by leverage remain limited, so selection should rely on training, case-specific judgment, and careful technique.
When choosing dental extraction forceps in 2026, use ISO 9173-1:2016 as a practical benchmark. This international standard sets general requirements and test methods for extraction forceps. Ask for documentation that identifies the exact model tested, not merely its product family. Check the beaks meet evenly, the hinge moves smoothly, and the handle does not twist under firm hand pressure. Small differences matter. Poor alignment can make a forceps feel unstable during a procedure.
WHO’s 2022 Global Oral Health Status Report estimates that oral diseases affect nearly 3.5 billion people worldwide. That scale makes dependable clinical instruments important, but the statistic does not prove one forceps design is superior. Inspect the finish around the hinge and beak tips under good light; rough edges and visible gaps deserve questions. Confirm the instrument’s intended tooth and patient use, then assess grip with a gloved hand. Fit matters. I would not treat a certificate as proof of perfect handling: standards-based test results support a decision, but they cannot replace a clinician’s assessment of balance, access, and control. Cite the ISO edition and WHO report when comparing supplier information.
How to Choose Dental Extraction Forceps in 2026
Before choosing extraction forceps, confirm that clear reprocessing instructions are available. ISO 17664-1:2021 addresses information manufacturers provide for processing reusable medical devices. It does not replace the device-specific instructions. Check that they cover cleaning, disinfection, inspection, packaging, sterilization, and storage where applicable.
Look for practical details: approved cleaning methods, water quality, detergent requirements, cycle parameters, and any limits on automated equipment. The instructions should explain how to open hinged joints and reach serrations where debris can collect. They should also identify inspection points, such as corrosion, looseness, or damaged tips. Small details matter.
Compare these instructions before purchasing, not after the forceps arrive. A design that feels comfortable may still be a poor fit if its cleaning steps cannot be followed consistently in your clinic. Keep the instructions accessible to staff, and follow the specified process rather than relying on habit. If a step is unclear, ask the supplier or manufacturer for clarification. A checklist helps, but it can still miss a worn hinge or a change in local workflow. Reassess the process when equipment or instructions change.
| Selection or verification dimension | What to assess | Practical guidance | Reprocessing check |
|---|---|---|---|
| Tooth and procedure | Tooth type, arch, root anatomy, and whether the procedure involves a tooth or retained root. | Choose a pattern intended for the clinical application. Forceps patterns differ in beak shape and access; no single pattern is suitable for every tooth or root configuration. | Confirm the instructions cover the exact reusable instrument and its intended processing method. |
| Beak design and fit | Beak curvature, width, alignment, and ability to engage the tooth without obstructing access. | Check that the beaks meet evenly and are free from visible damage. Use a design appropriate to the tooth and working space. | Check whether the manufacturer requires the instrument to be opened, disassembled, or otherwise positioned during cleaning and sterilization. |
| Access and handle geometry | Handle length, overall shape, visibility, and clearance in the intended area of the mouth. | Assess the instrument in a suitable clinical setting and select a geometry that supports controlled access and handling. | Verify that all surfaces, joints, and any textured areas can be reached by the cleaning method specified in the instructions. |
| Grip and control | Handle texture, balance, and secure handling with the expected gloves and technique. | Choose a grip that can be controlled comfortably. Do not rely on forceps as a substitute for appropriate technique or patient-specific clinical judgment. | Confirm that the cleaning instructions address residues in textured or serrated areas, if present. |
| Material and construction | Instrument material, finish, joints, and manufacturer-stated compatibility with repeated processing. | Reusable dental forceps are commonly made from corrosion-resistant stainless steel, but material and processing compatibility vary by device. Verify the product documentation rather than assuming compatibility. | Check stated limits or warnings for detergents, water quality, temperature, corrosion, and repeated processing. |
| Cleaning instructions | Validated manual or automated cleaning method, required equipment, detergent, and any pre-cleaning steps. | Use the cleaning method and sequence specified in the instrument’s current instructions for use (IFU). Cleaning should precede sterilization. | Under ISO 17664-1:2021, obtain and follow the manufacturer’s processing information for applicable reusable medical devices. Do not substitute an unvalidated cycle. |
| Inspection and maintenance | Beak alignment, cracks, corrosion, pitting, looseness, residues, and smooth operation. | Inspect after cleaning and before use. Remove a damaged, visibly soiled, or malfunctioning instrument from service according to facility procedures. | Follow the IFU for inspection, lubrication (if applicable), maintenance, and criteria for repair or retirement. |
| Packaging and sterilization | Compatible packaging system and sterilization method, load configuration, and monitoring requirements. | Use a sterilization method suitable for the device and packaging. Steam sterilization is commonly used for heat-stable dental instruments, but suitability and cycle settings are device-specific. | Use only the time, temperature, drying, and loading parameters validated or specified by the instrument and sterilizer instructions. ISO 17664-1:2021 does not establish one universal cycle for all forceps. |
| Traceability and documentation | Availability of current IFU, device identification, and records required by the clinic’s reprocessing system. | Before purchase, ensure staff can identify the instrument and access its processing instructions throughout its service life. | Document processing and sterilization in line with applicable local regulations and facility policy; follow the IFU if it is updated. |
| Final purchase check | Clinical suitability, intact construction, clear instructions, and support for the planned reprocessing workflow. | Compare the instrument’s pattern and handling characteristics with clinical needs, then confirm the device can be processed using the clinic’s validated equipment and procedures. | If instructions are missing, unclear, or incompatible with available equipment, obtain clarification from the manufacturer before use. |
Match the beaks to the tooth’s crown or root anatomy. Incisor beaks are usually narrower than molar beaks. Aim for a secure fit without rocking or trapping soft tissue.
The first digit identifies the quadrant, and the second counts from the midline. For example, 16 is the upper-right first molar, viewed from the patient’s perspective. Check the chart; reversing sides is easy.
No. Check the actual crown, root exposure, and access. Restorations or fractures can change the fit. I would pause if the beaks slip, even when the chart seems clear.
Under good light, check that the beaks meet evenly and the hinge moves smoothly. Look for gaps, rough edges, corrosion, or damaged tips. Small details matter.
It provides general requirements and test methods for extraction forceps. Ask for documentation identifying the exact model tested. A test result supports a decision; it does not prove the instrument will feel balanced in every hand.
Hold them with a gloved hand and assess grip, balance, and access. Apply firm hand pressure and notice whether the handle twists. Comfort alone is not enough.
Check for device-specific instructions covering cleaning, disinfection, inspection, packaging, sterilization, and storage where applicable. Look for details on water quality, detergents, and cycle parameters. Keep the instructions accessible to staff.
Open the hinge and check serrations for debris. Look for looseness, corrosion, or damaged tips. A checklist helps, but it may miss a worn hinge; reassess when equipment or instructions change.
Choosing Dental extraction forceps begins with identifying the tooth, its position in the upper or lower arch, and the planned procedure. These details help narrow the options and guide selection of beak shape and size. Match the beaks to the tooth’s anatomy, using the FDI two-digit system to confirm tooth identification and reduce selection errors. Also consider whether a straight, bayonet, or cowhorn design offers suitable access and leverage for the case.
Before use, assess the instrument’s design and performance against ISO 9173-1:2016, including its construction and intended function. Check that the forceps are comfortable to handle and appropriate for the clinical task. Finally, follow the manufacturer’s reprocessing instructions in line with ISO 17664-1:2021, covering cleaning, disinfection, inspection, packaging, and sterilization as applicable. A careful, systematic choice supports consistent handling and proper instrument care.